giovedì 30 novembre 2017

Gifts from the Elf

Ciao a tutti!
un giovedì speciale per me perché ho il piacere di condividere con voi la mia prima card, in qualità di   
Design Team member, dei deliziosi Bolilla's Stamps disegnati dalla talentuosa Valentina Pagan.
Nella pagina Facebook, ne potrete vedere tanti, ma visto il periodo, non potete esimermi dal colorare questo dolcissimo elfo:

Hi everyone!
a very special thursday  for me, because I've the pleasure to share with you my first card as a Bolilla's Stamps DT member drawn by Valentina Pagan.
In this FB page you could see many others, but in this case I "must" color this sweet elf:


Come nel mie corde, una card dallo stile pulito, un cui ho creato lo sfondo  di uno scenario invernale, usando varie dies e vari spessori 3D  donare profondità ai vari elementi.
Il sentiment é timbrato con il versamark ink su cartoncino nero e poi embossato di bianco e come ultima cosa ho incollato  l'elfo colorato con i copic e ritagliato con la silhouette Cameo.
Vi lascio qualche foto dei dettagli:

As is in my speed, a clean and simple card, in which the winter background is made whit dies cut and many 3D mousse pads to give depth to the elements.
The sentiment is stamped with Versamark ink and then embossed in white; as last thing I added the elf , previously cut out with Silhouette Cameo and colored with Copic markers.
Here some details' pictures:


Per tutte coloro che vogliano curiosare ed ammirare le altre meravigliose creazioni del DT, nonché acquisti i timbri Bolilla's Stamps potete cliccare

For those of you want to se the other amazing creation by the DT members or buy the Bolilla's Stamps  clic 

Vi ringrazio di essere passati a trovarmi!

Thanks for your time!

Ciao ciao!!!
SalvaSalva

martedì 28 novembre 2017

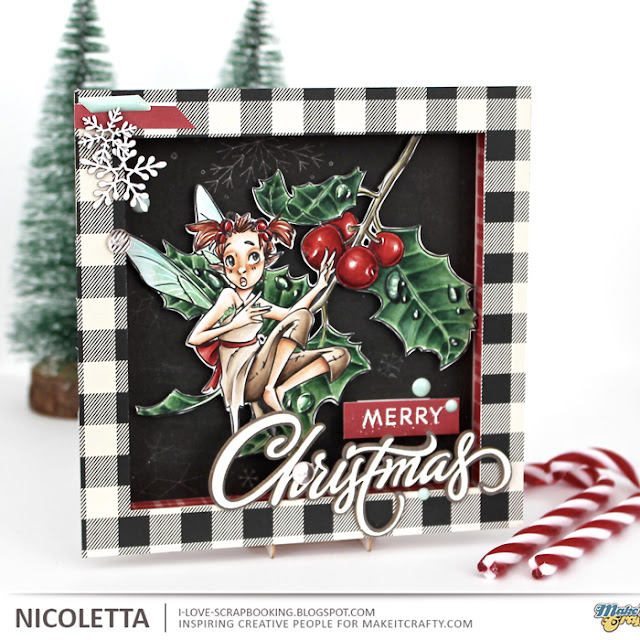
A sweet fairy berry

Ciao a tutti!
Finalemente la mia creatività si é rifatta sentire e sono riuscita a terminare il mio lavoro.
Quando i peggiori momenti scivolano via, colorare mi aiuta a rilassarmi e a ritrovare il mio mondo.
Per questo motivo , ho messo tanto amore nella colorazione di questa magica fatina  e nel realizzare la shadow box!

Hi everyone!
Finally, my creativity returned and I was been able to finish my work!
When the worst moments end, to color help me to relax and to find my world again.
It's for that I put so much love making this shadow box  and coloring this magical little fairy.
Non so se le avete vista ma Make it Crafty realizza delle bellissime shadow box di 2 profondità diverse e sono letteralmente meravigliose!
ogni colorazione messa su dentro una di loro assume un non so che di speciale!
So che siete curiosi perciò vi lascio la foto e sotto troverete tutti i link dei prodotti utilizzati:

I don't know if have already seen them but I'd like put the focus on the amazing MIC shadow boxes.
There are some shapes with 2 different depths.
Every coloring or everything you out inside them became so special.
I know you are curious now so here a picture:


dopo aver stampato, ritagliato e colorato  il timbro digitale"Fairy Berry Bandit", ho decorato la mia cornice usando carta patterned, qualche altra MIC chipboards e qualche enamel dot.
L'intera immagine é colorato con i copic markers e qualche tocco di matite prismacolor e di penna gel bianca (specialmente per disegnare le gocce d'acqua)

After printed, cut out and colored the "Fairy Berry Bandit digi stamp", I decorated the shadow box , using, patterned paper,  some other Mic chipboards and some enamel dots.
All the image is colored with copic markers and some touches of prismacolor pencils and white gel  pen (especially  do draw the water  drops).

Ecco i dettagli della colorazione:

Here the coloring detail:

L'elenco dei copic che ho usato:
  
 The copic markers I used:

skin:E0000/E000/E00/E11/R20/BV23
hair:E19/E17/E13/E11
fairy outifit: R59/R29/R27/R24/R22/C7//C3/C2/C0/C00/E44/E43/E42/E41/E40
wings:Y11/G12/G0000
leaves and berries: E77/E74/E71/E70/R59/R29/R27/R24/R22/
G29/G28/G24/G21/G20/Y11/YG0000/
YG93/YG95/100/T4/T2/

E qui i dettagli delle chipboards:

and here the chipboards detail:


MIC products:

Spero che vi piaccia e spero davvero di potervi mostrare qualcos'altro molto presto:-)
Buona giornata

Hope you like it and I really hope to be back in a short time :-)
Have a nice day

Ciao, Ciao


martedì 7 novembre 2017

Glow in the snow

Ciao a tutti!
sono davvero molto felice di annunciarci che le sfide  Colourful  di MIC sono tornate! lo so che avrò bisogno di più tempo ma so anche che sarà un tempo speso bene per uscire dalla propria comfort zone e migliorare le proprie capacità.
Per tutto il mese di novembre il tema da seguire sarà°


GLOW - Bagliore 
Vi chiediamo di colorare una scena o un personaggio con un elemento che emani una luce o un bagliore che si rifletta nell'immagine. Per esempio possono essere candele, lanterne, luci, luna, cielo, bacchette magiche e tanto ancora.
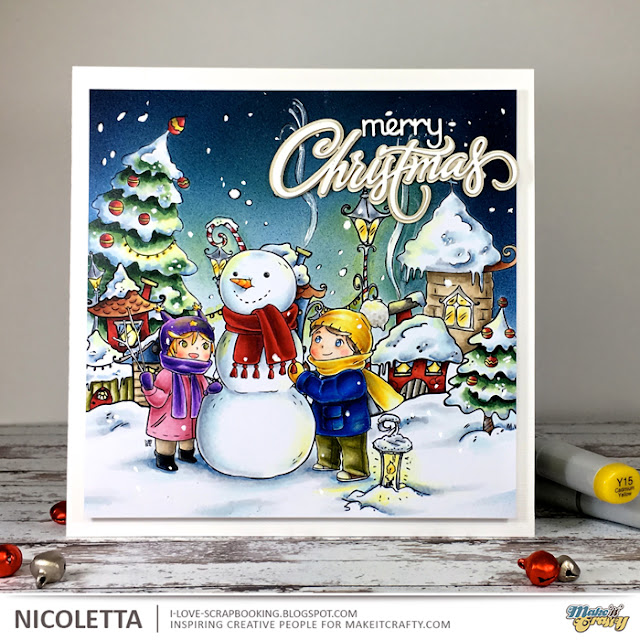
Questo é il mio lavoro:


Hi everyone!
I'm very very happy the MIC Colourful Challenges are back! I know it needs more time but it's a great time to step out our comfort zone
and improve our skills.
The november's  challenge will be running for whole month and the theme to follow is:
GLOW
We ask you to colour a scene or character with an element that glows. Examples: Candles, lanterns, lights, moon, sky, magical wands and more
Here's my work:

Ho creato la mia scena unendo vari timbri digitali su word.
Come potete vedere ci sono molti elementi che emanano luci, ma volevo qualcosa che illuminasse la neve vicino al bambino..
Dopo aver controllo tutto lo shop Make It Crafty, ho trovato un timbro digitale che timbro digitale raffiguarente una casa degli elfi che conteneva una piccola lanterna; sempre in Word ho ritagliato la lanterna e l'ho inserita sopra l'immagine precedentemente creata.
Colorarla tutta mi ha preso un po' di tempo devo ammetterlo, ma mi é piaciuto un sacco! e poi colorare é così rilassante!!!
Ho usato i copic markers...anche per il cielo, però con il sistema air brush avendo cura di mascherare prima tutti gli altri elementi.
Per colorare i fiocchi di neve ho usato il Copic Opaque White.
Alla fine ho aggiunto il sentiment creato con le meravigliose Chipboards MIC.
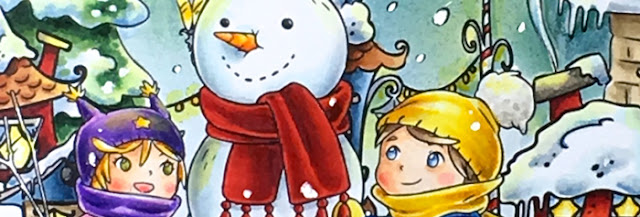
Ecco qualche dettaglio:

I did my scene marging some digi stamps on Word.
As you can see there are many elements that glows but I wanted something to glow on the snow near the boy.
After looking all stamps in the Make It Crafty shop, I found a digi stamps in which there was a small lantern; even in Word I cut out and put it on my scene.
Colouring all took me some time but I really enjoy that time. I used copic markers for everything... for the sky too.. I used the copic air brush system masking everything else before. For the snow I added some touches of copic opaque white.
At the end I added the sentiment using the amazing MIC chipboards.
Here some details:

Questa  la colorazione intera senza il sentiment:

This the entire coloring without the sentiment:


MAKE IT CRAFTY products:


Spero che la mia inspiration card vi sia piaciuta e vi ricordo di giocare con noi al nostro challenge, sia per migliorare le vostre tecniche di colorazione, per avere la possibilità di vincere un voucher da $ 5 da spendere nello shop Make it Crafty o anche semplicemente per divertirvi.
Potrete trovare tutti i dettagli su come partecipare su questo post.
Grazie per la visita!

I hope you like my inspiration coloring and i remember you to join with us at our  colourful challenge
to improve your skills,  to have the chance to receive a $5 gift voucher to spend at the Make it Crafty store, or and simply to have fun.
You'll can find all  details here in the blog post.
Thanks for you time

Ciao ciao

venerdì 27 ottobre 2017

Happy Halloween

Ciao a tutti!
Oggi voglio condividere una card per augurarvi "happy Halloween"
Ogni anno sento la necessità di creare qualcosa a tema Halloween e quando ho visto la nuova collezione di streghette Make it Crafty, sapevo che avrei utilizzato una di loro.
Ho combinato la stregata con il timbro di una deliziosa casetta per creare una scena dolce e simpatica.

Hi to everyone!
Today I'm here to share a card to wish you a great and happy Halloween!
Every year I need to made something relate to Halloween and as I saw the new  MIC witches  collection I knew I'd use one of them.
I combine her with a lovely house to create an happy and sweet scene.


Dopo aver stampato e mascherato l'immagine, ho lavorato sullo sfondo con gli inchiostri Distress Oxide; dopo ho colorato tutto con i copic markers a alla fine ho aggiunto i ciuffi d'erba e qualche ombra com le matite prismacolor.
Credetemi!! mi sono divertita un sacco!
Ecco i dettagli della colorazione:

After print and masked the image, I worked on the background with Distress Oxide inks; then 
I colored everything with copic markers and a the end I added some grass and shadow with prismacolor pencils.
Trust me.. I had so much fun!!!
Here's the coloring details:


Una lezione speciale per il sentimento: ho usato le bellissime chipboards Make it Crafty colorando anche questi con i copic marker.

A special mention for the sentiment: to make it I use the beautiful chipboards Make it Crafty coloring them too with copic markers.


MIC products:


 Spero che la mia card d'ispirazione MIC sia di vostro gradimento.!
Vi auguro di trascorrere un bel fine settimana e un bellissimo ponte di Halloween!
Grazie della visita.

Hope you like my MIC inspiration card!
Have a great weekend and a very happy Halloween!
Thanks for stopping by.
Ciao


venerdì 20 ottobre 2017

Clean and simple

Ciao a tutti!
Eccomi qui a condividere con voi la card di ispirazione che ho realizzato per Make it Crafty, in uno stile  davvero essenziale e semplice.

Hi to everyone!
Here I am to share a very simple and clean inspiration card using the beautiful chipboards by Make It Crafty.

La scorsa estate mi sono innamorata di un set di clear stamps contente varie foglie in stile tropical, non sapevo bene come le avrei utilizzate.
Un giorno, due amiche che erano venute a trovarmi mi chiedere di provare a timbrare le foglie per vedere l'effetto timbrato. Così ho preso un pezzo di cartoncino bianco e due inchiostri e timbra che ti timbra, il risultato mi é piaciuto così tanto che ho deciso che  quel pezzo di cartoncino non poteva rimanere una prova ma ci avrei fatto una card.
Mancava qualcosa per completarla a aggiungendo come sentiment una chipboard MIC, il risultato era perfetto!!
Come vedete il sentiment è composto da due parti; ho lasciato la base al naturale mentre ho colorato il top con i copic markers e poi ci ho aggiunto il glossy accents.
Ho completato il tutto aggiungendo qualche paillettes.


The last summer I felt in love about a set of leaves clear stamps but I didn't find the right way to use them.
One day two friends of mine came at home and asked me to try these tropical leaves, so I started to stamp them on a white cardstock,
As I finished, the result liked me so much I decided to make a card  trying to add a MIC  chipboard!
It was perfect!
I colored the top script chipboard with copic markers and I left the base in her original color. On the top I added  glossy accents too and then finished all adding some sequins.


MIC PRODUCT:


Anche per oggi é tutto
Grazie per la visita!

 That's that for today too!
Thanks for stopping by.

Ciao
 

martedì 10 ottobre 2017

Christmas Angel

Ciao a tutti!
Eccomi a condividere con voi la mia nuova card di ispirazione per Make it Crafty!
E finalmente ho iniziato a pensare al Natale... Non avrei potuto aspettare ancora a lungo perché il nostro boss, Zoe, ci ha proposto di riprovare a colorare qualcosa che avevamo colorato nel passato.
Alcuni dei  nuovi timbri digitali Mic sono infatti dei timbri non più in commercio di Krista Smith.
Adoro queste immagini da tantissimo tempo così, per fortuna, avevo già colorato  il timbro "Christmas Angel" e con questo ho fatto la mia card:

Hi everyone! 
 here I am to share with you my latest MIC  inspiration card!
And finally I started to think about Christmas...I couldn't wait any longer because our boss, Zoe, challenge us to color one of the new digis we  already colored in the past.
In fact the new MIC  digis  are old retired images  by Krista Smith.
I'm in love with these images for a long time so fortunately I'd already colored the "Christmas Angel" and  with it  I did my inspiration card:


Ho usato la funzione "print and cut" della mia Silhouette Cameo, grazie al file di taglio  SGV creato da Zoe e che potete trovare allegato all'immagine , insieme ad una versione già colorata di questo timbro.

I use the" print and cut" option in my Silhouette Cameo, thanks to the special SVG cutting file realized by Zoe, and I colored all with copic markers!
You could find the SVG file in a combination at the digi stampa and  a pre-colored  images od the same stamp.


Questo l'elenco dei copic markers che ho usato:

Copic markers I used:
Skin: E0000/E000/E00/E11/BV20/R20
Hair and shoes: E37/E35/E34/E33/E32
Dress: E42/E41/E40/R59/R29/R27/R24/R22
Wings: B00/B000/B0000/C1
Christmas baubles: B99/B97/B95/B91/G28/G24/G21/G20

Per fare lo sfondo ho sfumato  qualche tonalità di blu di distress oxide su un pezzo di cartoncino bianco; dopo ho aggiunto la nave usando uno stencil apposito con una pasta da rilevo e un po' di vernice dorata.

To make the background I blended some blue shades of distress oxide on a peace of white cardstock, stamped and embossed in white the sentiment;
then I added  snow using a stencil and a texture paste and a little bit of liquid gold paint.


Come vi avevo detto, avevo già colorato il timbro "Christmas Angel"  e avevo postato la card precisamente 4 anni fa:-)

As I told you I'd already colored the "Christmas Angel" and this is the version I posted 4 years ago in the same day :-)
You'll find the complete post HERE


MIC products:

E questo é tutto!
Spero che vi sia piaciuta

That's that! hope you like it.
Thanks for stopping by!
Ciao 
   

venerdì 22 settembre 2017

Sending love from the sea

Ciao a tutti!
oggi vi voglio mostrare il lavoro che ho fatto con uno dei nuovi prodotti  Make it Crafty!
La "Oval Shadow box chipboard"

Hi everyone
here to share with you what I did with one of the new shadow box chipoboard


Ho usato la oval shadow box per creare una scena marina in 3D.
Ho, dapprima, stampato e tagliato il timbro digitale Mermaid Sparkles digi stamp con la miasilhouette Cameo e poi l'ho colorato con i copic markers e qualche tocco di matita.
Dopo aver rivestito tutta la shadobox con la carta fantasia ho timbrato i raggi solari nello sfondo e ho ho aggiunto vari strati di onde; ho incollato la sirena e ho aggiunto molte sequins che rendono tutto molto scintillante; peccato dalla foto non si riesca a percepire tanto..

I used the oval shadow box to create a sea scene.
I printed and cut the digi  Mermaid Sparkles digi stamp with my silhouette Cameo and then colored it with copic markers
and some touches of pencil.
After covered the oval chipboard with patterned papers I stamped the sun rays on the background and then  added many layers of waves.
After positioned the mermaid  I glues so many sequins as you can see.
 But unfortunately, in the picture  you can't see the sparkee and shine it have.

Come ultima cosa ho messo sopra il sentiment anch'esso creato con delle chipboards Make it Crafty

As a last thing, i put on the top, the 
words chipboards.

Make it Crafty product I use
Sending adapt-a-word chipboard


E' stato davvero molto divertente creare questo shadow box marina!
volete provarci anche voi?
intanto vi ringrazio per la visita e vi auguro buon fine settimana!

I really had so much fun  playing with the shadow box!
I think you'd like to tray it:-)
Thanks for your time

Ciao!!!

mercoledì 20 settembre 2017

Thanks for everything

Ciao amici e amiche!
Oggi condivido con voi un altra card!
Anche questa volta ho optato per uno stile davvero semplice che enfatizzasse il delizioso timbro Some Odd Girl.

Hi friends!
 today today I  share with you my latest CAS card!
This time too I left the style card very simple to emphasize the lovely SOG stamps.

Dopo aver fatto un leggero sfondo blu con i Distress Inks Ho colorato il timbro digitale  Rockin' Kody,  con i copic markers e l'ho messo sopra al pentagramma nero.

After made a light blue background with distress inks I colored the Rockin' Kody digi stamp with copic markers and put it on  a black stave.

Dopo ho aggiunto il sentiment e qualche sequins per completare il tutto.

Then I added the sentiment and some sequins to complete it.

e anche per oggi é tutto!
Spero che la mia card vi sia piaciuta!
Buona settimana

and that's that for today too!
Hope you like my card.
Have a great week!

SalvaSalvaSalvaSalvaSalvaSalva

lunedì 18 settembre 2017

Sweet little monster

Ciao a tutti cari lettori!
Dopo  Marika e Andrea,  é il mio turno per continuare la maratona "CASE" in case Make it Crafty! "case" significa, praticamente copiare! non é necessario che sia uguale, anzi a mio parere, anche in questo caso, bisogna sempre personalizzare le proprie creazioni!
Se site fans di MIC, sicuramente sapete che la carta che stiamo prendendo a riferimento é questa di Deborah e questo é il mio lavoro:

Hi everyone!
After Marika and Andrea, it's my turn to continue the "CASE" (Copy And Steal Everything) maratone!
If you are MIC fans, we had already heard,  we are "copying" the Deborah's card and here's my work:


Ho colorate il dolcissimo mostricciatolo Henry Tail Twirl digi stamp, con i copic markers, seguendo questo  tutorial di Zoe; ho solo modificato i colori scegliendo le tonalità del blu/verde:

I colored the sweet little monster Henry Tail Twirl digi stampwith copic markers, following
the  Zoe's tutorial; I changed only the colors choosing a blue/green tones:


Copic markers used:
BG78/BG57/BG13/BG11/YR18/YR15/YR14/Y13/Y11
 
Con i colori arancioni, ho colorato anche la chipboard "BOO! e per completare la card ho aggiunto, solo, un piccolo sentiment e qualche enamel dots.

With orange shades I colored the "BOO!"  MIC chippie, too and to complete the card I added a little sentiment and some enamel dots.


Mic products:

E anche per oggi é tutto!
Grazie della visita.

That's that!
Thanks for your time

Ciao

giovedì 14 settembre 2017

Time to say thanks

Ciaoo!
ecco!! ve lo devo dire... mi sono dimenticata di fare un post! 
la card che vedrete l'ho realizzata per il challenge mensile di agosto di Some Odd Girl quindi capite bene che sono in ritardo di quasi due mesi.
Ma sta diventando un'abitudine che agosto sia un mese abbastanza difficile e  avevo tanti pensieri per la testa.
Comunque mi piace un sacco e non volevo perdere l'occasione sia per mostrarvela, che per archiviarla qui nel mio blog.
Eccola:


il tema del challenge voleva "tanti strati" cosa che in genere rappresenta un idea di card non proprio moderna come piace a me.
Quindi devo dire che ho pensato non poco a come realizzare una card che avesse diversi strati di carta 
facendo, comunque, in modo che risultasse minimal e moderna.
Sovrapporre le strisce di patterned in diagonale  é stata l'dea!
poi ho  la scritta "grazie" in foam e il sentiment embossato in bianco


Anche per oggi é tutto! 
Grazie della visita!!!

martedì 5 settembre 2017

Having fun with prismacolor pencils

Ciao a tutti!
Settembre é arrivato e con esso la solita routine! questo mese rappresenta sempre un nuovo inizio e ciò comporta buoni propositi.
Non so se avrò più tempo o meno ma quello che prometto a me stessa e di ritagliarmi gli spazi per la creatività.
Perciò mi auguro che possiate vedere vari lavori da queste parti:-P
Inizio mostrandovi la mia ultima card Some Odd Girl .  
La nostra compagnia Anna, lascia il DT dopo ben 5 anni e per salutarla degnamente le abbiamo organizzato una sorpresa:
Ciascuno nel DT, ha scelto un lavoro di Anna  da usare come linea guida per il proprio progetto.
Io ho scelto questa card e questa è la mia interpretazione:

September is arrived with all the normally routines! This month is even a new start so good intentions are a duty!
 I don't know if I'll have more or less time but promise myself to find my time to creativity,
So I hope you could see many artworks by me;-)
I'm starting to show you the latest card i created for a special event at the Some Odd Girl blog!
Our dear DT teamie Anna , has left the SOG dt, so we organize a little surprise to say her goodbye!
Everyone in the Dt choose an Anna's card and cased it:-)
I chose this card and this is my lift:


Ho tenuto lo stesso layout che ha usato Anna, ma ho usato un immagine differente.
Ho scelto l'adorabile Snow White digi stamp,
L'ho stampata su cartoncino grigio e l'ho ritagliata con la Silhouette Cameo; Poi l'ho colorata con le matite Prismacolor.
Queste le foto dei dettagli:


I kept the same layout Anna used but I changed the image:
I chose the lovely Snow White digi stamp,
I printed the image on  gray cardstock and cut out with the Silhouette Cameo. Then I colored Snow White and the critters with prismacolor pencils.
Here's the  image details:


 E anche per oggi é tutto!
Spero che la mia ispirazione vi sia piaciuta e vi ringrazio per la visita.

And for today that's that!
Hope you like my inspiration!
thanks for your time.

Ciao
 

linktwin

Related Posts with Thumbnails

ShareThis